Building a Desktop ToDo App in Rust with GPUI, Zed's UI Framework
GPUI is the GPU-rendered Rust UI framework built for Zed, and Discord plans to adopt it. This article builds a ToDo app with GPUI Kit while covering state management with Entity, re-rendering with cx.notify(), and actions with key bindings.
Electron is a widely used framework for building desktop apps. Visual Studio Code, Slack, and Discord are all built with it. Electron lets you build apps for macOS, Windows, and Linux with web development skills, but because every app bundles and runs its own browser engine, memory usage and app size tend to grow large. Rendering is also affected by DOM layout and JavaScript garbage collection, and when these pile up, screen updates can fall behind and cause stuttering in scrolling and animations.
These issues have led to more alternatives to Electron. Tauri displays a web-based UI using the OS's built-in WebView instead of bundling Chromium, while
egui and
Iced let you write UIs purely in Rust without web technologies.
GPUI belongs to the latter group, and the entire UI of the code editor
Zed is rendered with GPUI.
GPUI is starting to be adopted outside of Zed as well. In November 2026, Stanislav Vishnevskiy, Discord's co-founder and CTO, revealed plans to rebuild Discord's Electron-based desktop app with GPUI.
In this article, we build a simple ToDo app step by step with GPUI and look at GPUI's unique state management model and how to handle events.
GPUI is a pre-1.0 framework, and its official README states that breaking changes between versions are frequent. The code in this article was verified on November 8, 2026, with Rust 1.99.1 and gpui-kit 0.9.0.
What is GPUI?
GPUI is a UI framework developed by Zed Industries, the company behind Zed. Its official site describes it as a hybrid immediate and retained mode, GPU-accelerated UI framework. Immediate mode rebuilds the entire UI from the current data on every render, an approach used by Rust UI libraries such as egui. Retained mode keeps UI parts around as objects and updates only the parts that changed, with the browser DOM being the classic example.
The reasons Zed built its own UI framework are explained in the 2023 Zed blog post Leveraging Rust and the GPU to render user interfaces at 120 FPS. The Zed team previously built the Electron-based Atom editor and struggled with screen updates that could not finish within a single frame because of garbage collection pauses and DOM relayouts. So, like a video game, they adopted an approach that breaks the UI down into primitives such as rectangles, shadows, and text, and draws them with GPU shaders.
GPUI's API consists of three concepts called "registers".
Entity: Holds application state. GPUI owns the state, and your code accesses it through a reference-counted handle similar toRc- View: An
Entitythat implements theRendertrait. It builds an element tree withdiv()and friends, and styles it with Tailwind CSS-like method chains Element: A low-level API that directly controls layout and painting. Used when you need specialized rendering, such as in a code editor
This article does not cover the low-level Element API and builds the app with Entity and View.
Creating the project
GPUI uses Metal for rendering on macOS, so you need Xcode and the Xcode Command Line Tools. Use the latest stable version of Rust.
xcode-select --install
rustup update stable
Create a project with Cargo and add gpui-kit.
cargo new gpui-todo-app
cd gpui-todo-app
cargo add [email protected]The gpui crate on crates.io has not been updated since 0.2.2 in October 2025, and things like application startup differ from the current GPUI in Zed. GPUI Kit, which this article uses, pins and re-exports the gpui-pre crate, which is published as a snapshot of Zed's main branch (gpui-kit 0.9.0 uses 0.3.11, as of Zed commit f816e1f).
Your Cargo.toml looks like this:
[package]
name = "gpui-todo-app"
version = "0.1.0"
edition = "2024"

[dependencies]
gpui-kit = "0.9.0"
Showing a window
First, let's create a window that displays only a title. Replace src/main.rs with the following:
use gpui_kit::{prelude::*, *};

struct TodoApp {
    title: SharedString,
}

impl Render for TodoApp {
    fn render(&mut self, _window: &mut Window, _cx: &mut Context<Self>) -> impl IntoElement {
        div()
            .flex()
            .flex_col()
            .size_full()
            .p_4()
            .bg(rgb(0xffffff))
            .text_color(rgb(0x111827))
            .child(div().text_xl().child(self.title.clone()))
    }
}

fn main() {
    gpui_kit::application().run(|cx: &mut App| {
        let bounds = Bounds::centered(None, size(px(420.), px(480.)), cx);
        cx.open_window(
            WindowOptions {
                window_bounds: Some(WindowBounds::Windowed(bounds)),
                ..Default::default()
            },
            |_window, cx| {
                cx.new(|_cx| TodoApp {
                    title: "ToDo".into(),
                })
            },
        )
        .unwrap();
        cx.activate(true);
    });
}
Let's walk through it, starting with the main function.
gpui_kit::application()is a re-export of GPUI'sgpui_platform::application(), which creates anApplicationwith the platform implementation for the OS you are running on. The closure passed torun()is called once after the app starts- The closure's argument
cx: &mut Appis the object that owns the state of the whole application. Every operation, such as opening a window or quitting the app, goes throughApp - The second argument to
cx.open_window()is a closure that returns the View placed at the root of the window. It hands theTodoAppstate toAppwithcx.new()and returns its handle, anEntity<TodoApp> cx.activate(true)brings the app to the foreground
TodoApp implements the Render trait. The render() method returns an element tree, and GPUI calls the root View's render() every time it redraws the window. The window is redrawn when the display needs to be updated, for example when a state change is signaled with cx.notify(), which we'll cover later. div() is a general-purpose element equivalent to HTML's div element, and you style it with methods close to Tailwind CSS class names, such as .flex(), .p_4(), and .text_xl(). .child() adds a child element, and you can pass strings directly as children.
div()
    .flex()
    .flex_col()
    .size_full()
    .p_4()
    .bg(rgb(0xffffff))
    .text_color(rgb(0x111827))
    .child(div().text_xl().child(self.title.clone()))
SharedString is GPUI's string type, and it can hold either a static string or a reference-counted string. Because render() is called on every redraw, this type is used so that clone() does not copy the string on the heap. SharedString implements the From trait for &str and String, so you can convert a string literal into a SharedString with .into(), as in "ToDo".into().
The prelude::* on the first line brings in trait methods such as .when(), which we'll use later. Run cargo run, and a window showing "ToDo" appears.
cargo run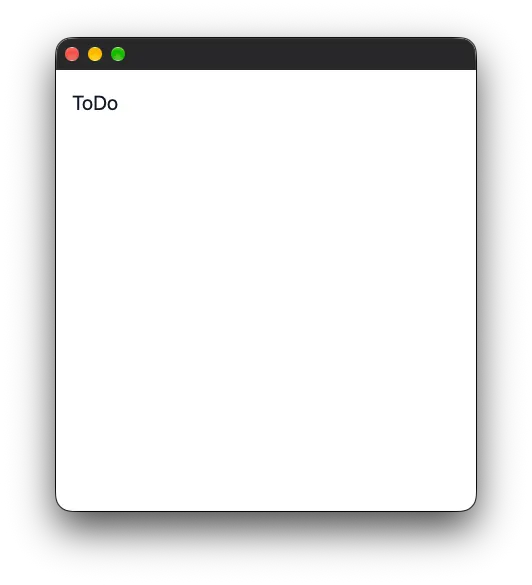
Rendering the ToDo list and updating it on click
Next, let's display a list of ToDos and toggle an item between done and not done when it is clicked. Here is the complete src/main.rs for this section:
use gpui_kit::{prelude::*, *};

struct Todo {
    title: SharedString,
    done: bool,
}

struct TodoApp {
    todos: Vec<Todo>,
}

impl Render for TodoApp {
    fn render(&mut self, _window: &mut Window, cx: &mut Context<Self>) -> impl IntoElement {
        let remaining = self.todos.iter().filter(|todo| !todo.done).count();

        div()
            .flex()
            .flex_col()
            .gap_2()
            .size_full()
            .p_4()
            .bg(rgb(0xffffff))
            .text_color(rgb(0x111827))
            .child(div().text_xl().child("ToDo"))
            .children(self.todos.iter().enumerate().map(|(ix, todo)| {
                div()
                    .id(ix)
                    .flex()
                    .gap_2()
                    .px_2()
                    .py_1()
                    .rounded_md()
                    .cursor_pointer()
                    .hover(|style| style.bg(rgb(0xf3f4f6)))
                    .when(todo.done, |this| {
                        this.line_through().text_color(rgb(0x9ca3af))
                    })
                    .on_click(cx.listener(move |this, _event: &ClickEvent, _window, cx| {
                        this.todos[ix].done = !this.todos[ix].done;
                        cx.notify();
                    }))
                    .child(if todo.done { "☑" } else { "☐" })
                    .child(todo.title.clone())
            }))
            .child(
                div()
                    .text_sm()
                    .text_color(rgb(0x6b7280))
                    .child(format!("残り {remaining} 件")),
            )
    }
}

fn main() {
    gpui_kit::application().run(|cx: &mut App| {
        let bounds = Bounds::centered(None, size(px(420.), px(480.)), cx);
        cx.open_window(
            WindowOptions {
                window_bounds: Some(WindowBounds::Windowed(bounds)),
                ..Default::default()
            },
            |_window, cx| {
                cx.new(|_cx| TodoApp {
                    todos: vec![
                        Todo {
                            title: "牛乳を買う".into(),
                            done: false,
                        },
                        Todo {
                            title: "GPUI のドキュメントを読む".into(),
                            done: true,
                        },
                        Todo {
                            title: "ブログ記事を書く".into(),
                            done: false,
                        },
                    ],
                })
            },
        )
        .unwrap();
        cx.activate(true);
    });
}
Holding ToDo data as state
We give TodoApp the ToDos to display in the list as View state. We define a Todo struct representing the title and completion status of a single ToDo, and give TodoApp a todos array of Todos.
struct Todo {
    title: SharedString,
    done: bool,
}

struct TodoApp {
    todos: Vec<Todo>,
}
A GPUI View keeps the data it displays in its own fields and builds elements from those fields in render(). The elements returned by render() are rebuilt on every render, so any completion status stored on an element would be lost on the next render. Instead, we store the completion status in TodoApp's todos, which persists across renders, and update it when an item is clicked.
The initial data is passed in when TodoApp is created in main().
cx.new(|_cx| TodoApp {
    todos: vec![
        Todo {
            title: "牛乳を買う".into(),
            done: false,
        },
        // The remaining two items are omitted
    ],
})
Building the ToDo list from state
In render(), we turn each element of self.todos into a div() to build the list.
.children(self.todos.iter().enumerate().map(|(ix, todo)| {
    div()
        .flex()
        .gap_2()
        .px_2()
        .py_1()
        .rounded_md()
        .child(if todo.done { "☑" } else { "☐" })
        .child(todo.title.clone())
}))
.children() takes an iterator and adds multiple child elements at once. enumerate() attaches a number starting from 0 to each element of the iterator, producing (number, element) tuples. ix is short for index and represents the position of the ToDo in self.todos. We'll use this ix later to identify which ToDo was clicked.
Below the list, we show the number of unfinished ToDos. We count them at the top of render(), format the count into a string with format!, and add it as a child element.
let remaining = self.todos.iter().filter(|todo| !todo.done).count();.child(
div()
.text_sm()
.text_color(rgb(0x6b7280))
.child(format!("残り {remaining} 件")),
)render() simply builds elements from self.todos. When the state changes and the window re-renders, an element tree matching the new state is rebuilt. This is similar to how React function components work.
Striking through completed items
Completed ToDos are shown with a strikethrough and a lighter text color.
.when(todo.done, |this| {
    this.line_through().text_color(rgb(0x9ca3af))
})
.when(condition, closure) adds styles through the closure only when the condition is true. It lets you write conditional styles inside a method chain without branching with an if expression to build different elements. .when() is a method of the FluentBuilder trait, which is brought in by prelude::*.
Toggling done and not done on click
Finally, we flip done when an item is clicked. This takes three things:
- Give the element an ID
- Modify
TodoApp's state from the handler - Ask GPUI to re-render
First, give the element an ID with .id(ix).
div()
    .id(ix)
Because GPUI's element tree is rebuilt on every re-render, you need an ID to identify an element across re-renders, for example to check whether the element where the mouse button was pressed is the same as the one where it was released. Adding .id() to a div() changes its type to Stateful<Div>. The .on_click() method we use next belongs to the StatefulInteractiveElement trait, which only Stateful elements implement, so you cannot call it on a div() without an ID.
We also set the cursor shape and a hover background color so it's clear the item is clickable. Styles that are resolved within a single frame, like .hover(), work without an ID.
.cursor_pointer()
.hover(|style| style.bg(rgb(0xf3f4f6)))
Next, register a click handler with .on_click().
.on_click(cx.listener(move |this, _event: &ClickEvent, _window, cx| {
    this.todos[ix].done = !this.todos[ix].done;
    cx.notify();
}))
Inside the handler, we need to modify TodoApp's todos. However, .on_click() takes a closure of type Fn(&ClickEvent, &mut Window, &mut App), which has no parameter for self. You also can't capture the &mut self that render() received in the closure, because the closure is called after render() has finished.
cx.listener() solves this problem. When you pass a closure of the form |this: &mut TodoApp, event, window, cx| to listener() on Context<TodoApp>, it is converted into a closure that .on_click() accepts. The converted closure holds a weak reference (WeakEntity) to TodoApp, and when called, it borrows a mutable reference to TodoApp from App and runs the original closure. The move keyword moves the value into the closure so that ix is still usable when the closure is called after render().
At the end of the handler, we call cx.notify(). GPUI does not automatically detect that an Entity's fields have been modified. cx.notify() tells GPUI that "this Entity's state has changed" and notifies other Entitys and windows observing that Entity. The window displaying the View receives this notification and re-renders. If you don't call cx.notify(), no re-render happens, so even though done changes, the screen keeps showing the previous state.
Run cargo run and click an item: the checkmark and strikethrough toggle, and the remaining count updates.
GPUI's state management model
The code so far has introduced Entity, App, and Context. Let's sort out how they relate to each other.
In GPUI, App owns all state created with cx.new(). The Entity<T> returned by cx.new() is just a handle, and like Rc, calling clone() on it increments the reference count. Unlike Rc, however, an Entity<T> alone cannot read or write its contents. To access the state, you pass App along and call read() or update().
let counter: Entity<Counter> = cx.new(|_cx| Counter { count: 0 });

// Borrow Counter from App and modify it
counter.update(cx, |counter: &mut Counter, cx: &mut Context<Counter>| {
    counter.count += 1;
    cx.notify();
});

// Borrow Counter from App and read it
let count = counter.read(cx).count;
The Context<Counter> passed to the update() closure is App plus information about which Entity is being updated. Context<T> dereferences to App, so you can pass it directly to functions that take App. Entity-specific operations such as cx.notify() exist only on Context<T>.
Nathan Sobo of Zed explains the reasoning behind this design in Ownership and data flow in GPUI. Rust's ownership model works well with tree-shaped data but poorly with patterns common in UIs, such as referencing
self from event callbacks. The team first tried an implementation using the standard library's Rc, but it didn't work out, and they arrived at the current design, in which App owns all state and "lends" it out only during updates.
There are two mechanisms for Entitys to work together:
cx.observe(): Runs a callback whencx.notify()is called on the observedEntitycx.subscribe(): Receives typed events that the observedEntityemits withcx.emit(). The emitting side implements theEventEmitter<EventType>trait
The input field we add next uses subscribe to receive the Enter key event from the input.
Adding an input field with GPUI Kit
GPUI itself does not include ready-made components such as buttons or text inputs. The GPUI repository has an input field example, but it implements cursor movement, selection, and handling of in-progress IME composition all by hand, and runs to about 900 lines. From here on, we use GPUI Kit's
Input, Checkbox, and Button to let users add ToDos from an input field.
Here is the complete src/main.rs for this section:
use gpui_kit::component::{
    ActiveTheme as _,
    button::{Button, ButtonVariants as _},
    checkbox::Checkbox,
    input::{Input, InputEvent, InputState},
};
use gpui_kit::{prelude::*, *};

struct Todo {
    title: SharedString,
    done: bool,
}

struct TodoApp {
    input: Entity<InputState>,
    todos: Vec<Todo>,
    _subscriptions: Vec<Subscription>,
}

impl TodoApp {
    fn new(window: &mut Window, cx: &mut Context<Self>) -> Self {
        let input = cx.new(|cx| InputState::new(window, cx).placeholder("やることを入力"));
        input.update(cx, |input, cx| input.focus(window, cx));

        // Subscribe to the event InputState emits on Enter
        let subscription = cx.subscribe_in(&input, window, |this, _input, event, window, cx| {
            if let InputEvent::PressEnter { .. } = event {
                this.add_todo(window, cx);
            }
        });

        Self {
            input,
            todos: Vec::new(),
            _subscriptions: vec![subscription],
        }
    }

    fn add_todo(&mut self, window: &mut Window, cx: &mut Context<Self>) {
        let title = self.input.read(cx).value().trim().to_string();
        if title.is_empty() {
            return;
        }
        self.todos.push(Todo {
            title: title.into(),
            done: false,
        });
        self.input
            .update(cx, |input, cx| input.set_value("", window, cx));
        cx.notify();
    }
}

impl Render for TodoApp {
    fn render(&mut self, _window: &mut Window, cx: &mut Context<Self>) -> impl IntoElement {
        let remaining = self.todos.iter().filter(|todo| !todo.done).count();

        div()
            .flex()
            .flex_col()
            .gap_3()
            .size_full()
            .p_4()
            .bg(cx.theme().background)
            .text_color(cx.theme().foreground)
            .child(div().text_xl().child("ToDo"))
            .child(
                div()
                    .flex()
                    .gap_2()
                    .child(div().flex_1().child(Input::new(&self.input)))
                    .child(
                        Button::new("add")
                            .primary()
                            .label("追加")
                            .on_click(cx.listener(|this, _, window, cx| this.add_todo(window, cx))),
                    ),
            )
            .children(self.todos.iter().enumerate().map(|(ix, todo)| {
                div()
                    .flex()
                    .items_center()
                    .justify_between()
                    .child(
                        Checkbox::new(("todo", ix))
                            .label(todo.title.clone())
                            .checked(todo.done)
                            .on_change(cx.listener(move |this, checked: &bool, _, cx| {
                                this.todos[ix].done = *checked;
                                cx.notify();
                            })),
                    )
                    .child(
                        Button::new(("delete", ix))
                            .ghost()
                            .label("削除")
                            .on_click(cx.listener(move |this, _, _, cx| {
                                this.todos.remove(ix);
                                cx.notify();
                            })),
                    )
            }))
            .child(
                div()
                    .text_sm()
                    .text_color(cx.theme().muted_foreground)
                    .child(format!("残り {remaining} 件")),
            )
    }
}

fn main() {
    gpui_kit::application()
        .with_assets(gpui_kit::assets::Assets)
        .run(|cx: &mut App| {
            gpui_kit::init(cx);

            let bounds = Bounds::centered(None, size(px(420.), px(480.)), cx);
            gpui_kit::open_window(
                WindowOptions {
                    window_bounds: Some(WindowBounds::Windowed(bounds)),
                    ..Default::default()
                },
                cx,
                |window, cx| cx.new(|cx| TodoApp::new(window, cx)),
            )
            .unwrap();
            cx.activate(true);
        });
}
The following subsections explain, one change at a time, the order in which this code was changed from the previous section.
Initializing GPUI Kit
GPUI Kit components cannot render unless initial settings such as themes and icons are registered. So before using any components, we rewrite main().
fn main() {
    gpui_kit::application()
        .with_assets(gpui_kit::assets::Assets)
        .run(|cx: &mut App| {
            gpui_kit::init(cx);

            let bounds = Bounds::centered(None, size(px(420.), px(480.)), cx);
            gpui_kit::open_window(
                WindowOptions {
                    window_bounds: Some(WindowBounds::Windowed(bounds)),
                    ..Default::default()
                },
                cx,
                |window, cx| cx.new(|cx| TodoApp::new(window, cx)),
            )
            .unwrap();
            cx.activate(true);
        });
}
Compared with the GPUI-only version, three things have changed:
.with_assets(gpui_kit::assets::Assets)makes the icon SVGs used by the components loadablegpui_kit::init(cx)initializes GPUI Kit. It registers the theme and each component's initial settings, so you must call it once before using any componentsgpui_kit::open_window()is used instead ofcx.open_window(). This function wraps the given View in GPUI Kit'sRootbefore opening the window.Rootis a View that draws dialogs, notifications, and the like on top of your View
The root View is now created with TodoApp::new(window, cx) instead of a struct literal. We implement this function in the next step.
Holding the input state as an Entity
GPUI Kit components are imported from gpui_kit::component.
use gpui_kit::component::{
    ActiveTheme as _,
    button::{Button, ButtonVariants as _},
    checkbox::Checkbox,
    input::{Input, InputEvent, InputState},
};
The input field's state, such as the text being typed and the cursor position, is held by GPUI Kit's InputState. InputState is a separate Entity from TodoApp, and TodoApp keeps its handle in the input field. The _subscriptions field holds the Subscription we'll use later to subscribe to the Enter key event.
struct TodoApp {
    input: Entity<InputState>,
    todos: Vec<Todo>,
    _subscriptions: Vec<Subscription>,
}
InputState::new() requires a Window argument. That's why we moved the creation of TodoApp into a TodoApp::new() function that receives window.
impl TodoApp {
    fn new(window: &mut Window, cx: &mut Context<Self>) -> Self {
        let input = cx.new(|cx| InputState::new(window, cx).placeholder("やることを入力"));
        input.update(cx, |input, cx| input.focus(window, cx));

        // ...
    }
}
We call focus() on the InputState created with cx.new() through input.update(). This automatically focuses the input field right after the app starts.
Rendering the input field and the Add button
In render(), we place the input field and the "追加" (Add) button side by side below the title.
.child(
    div()
        .flex()
        .gap_2()
        .child(div().flex_1().child(Input::new(&self.input)))
        .child(
            Button::new("add")
                .primary()
                .label("追加")
                .on_click(cx.listener(|this, _, window, cx| this.add_todo(window, cx))),
        ),
)
GPUI Kit components are added to the element tree with .child(), just like div(). Input::new(&self.input) is an element that renders the InputState, and the state itself lives in the Entity held by TodoApp. So even though render() rebuilds Input on every re-render, the text being typed is not lost.
The argument to Button::new() is the element's ID. Just as we added .id() to the div() in the previous section, elements that handle clicks need an ID. As in the previous section, the click handler is converted with cx.listener() and calls add_todo(), which we implement in the next step.
Adding a ToDo from the input value
add_todo() is a method that reads the input value, adds a ToDo, and clears the input field.
fn add_todo(&mut self, window: &mut Window, cx: &mut Context<Self>) {
    let title = self.input.read(cx).value().trim().to_string();
    if title.is_empty() {
        return;
    }
    self.todos.push(Todo {
        title: title.into(),
        done: false,
    });
    self.input
        .update(cx, |input, cx| input.set_value("", window, cx));
    cx.notify();
}
The input value is read with self.input.read(cx).value(). To clear the input field, we borrow the InputState with self.input.update() and call set_value(). You can see that the read() and update() on Entity described in "GPUI's state management model" are used here exactly as explained. Whitespace-only strings are rejected by the is_empty() check at the top, so they are not added. After modifying todos, we request a re-render with cx.notify(), as in the previous section.
Adding with the Enter key too
Besides clicking the button, we also add a ToDo when the Enter key is pressed in the input field. InputState emits InputEvent::PressEnter when Enter is pressed, so we subscribe to this event inside TodoApp::new().
// Subscribe to the event InputState emits on Enter
let subscription = cx.subscribe_in(&input, window, |this, _input, event, window, cx| {
    if let InputEvent::PressEnter { .. } = event {
        this.add_todo(window, cx);
    }
});

Self {
    input,
    todos: Vec::new(),
    _subscriptions: vec![subscription],
}
cx.subscribe_in() subscribes to events emitted by the given Entity. The difference from cx.subscribe(), introduced in "GPUI's state management model", is that the callback receives &mut Window. add_todo() needs a Window to clear the input field, so we use subscribe_in() here.
The Subscription returned by subscribe_in() represents the registered subscription, and the subscription is canceled when it is dropped. If you discard it as a local variable inside new(), nothing happens when you press Enter. That's why we keep it in TodoApp's _subscriptions field, so the subscription stays active as long as TodoApp exists.
Replacing with a checkbox and a delete button
In the previous section, clicking a div() toggled the completion status. We replace this with GPUI Kit's Checkbox and also add a button to delete a ToDo.
.children(self.todos.iter().enumerate().map(|(ix, todo)| {
    div()
        .flex()
        .items_center()
        .justify_between()
        .child(
            Checkbox::new(("todo", ix))
                .label(todo.title.clone())
                .checked(todo.done)
                .on_change(cx.listener(move |this, checked: &bool, _, cx| {
                    this.todos[ix].done = *checked;
                    cx.notify();
                })),
        )
        .child(
            Button::new(("delete", ix))
                .ghost()
                .label("削除")
                .on_click(cx.listener(move |this, _, _, cx| {
                    this.todos.remove(ix);
                    cx.notify();
                })),
        )
}))
Since Checkbox and Button handle the clicks, the outer div() no longer needs .id() or .on_click(). We pass tuples such as ("todo", ix) as the IDs for Checkbox and Button. Because multiple elements with the same name are lined up, we append ix to make each ID unique.
Checkbox does not hold its own checked state. It receives the value to display through .checked(todo.done), and when clicked, it passes the new value to .on_change(). When TodoApp updates todos and calls cx.notify(), the re-render draws the Checkbox with the new value. TodoApp remains the owner of the state, and Checkbox only displays its value. This is the same idea as React's controlled components.
Using theme colors
Finally, we replace the colors specified directly with rgb() with GPUI Kit's theme colors.
.bg(cx.theme().background)
.text_color(cx.theme().foreground).text_color(cx.theme().muted_foreground)cx.theme() reads the theme registered by gpui_kit::init(). It is a method of the ActiveTheme trait, which is why we import ActiveTheme as _ with use. GPUI Kit components are also drawn with theme colors, so matching the colors of your own div()s to the theme keeps them visually consistent with the components.
Run cargo run, type into the input field, and press Enter or click the "追加" (Add) button to add a ToDo.
Defining keyboard operations with actions
Finally, let's add an operation that deletes all completed ToDos at once with cmd-shift-backspace.
GPUI's key dispatch documentation describes GPUI as designed for keyboard-first interactivity. Mouse operations are implemented with button click handlers, while keyboard operations are implemented by combining "actions" and "key contexts".
Here is the complete src/main.rs for this section:
use gpui_kit::component::{
    ActiveTheme as _,
    button::{Button, ButtonVariants as _},
    checkbox::Checkbox,
    input::{Input, InputEvent, InputState},
};
use gpui_kit::{prelude::*, *};

actions!(todo_app, [ClearCompleted]);

struct Todo {
    title: SharedString,
    done: bool,
}

struct TodoApp {
    input: Entity<InputState>,
    todos: Vec<Todo>,
    _subscriptions: Vec<Subscription>,
}

impl TodoApp {
    fn new(window: &mut Window, cx: &mut Context<Self>) -> Self {
        let input = cx.new(|cx| InputState::new(window, cx).placeholder("やることを入力"));
        input.update(cx, |input, cx| input.focus(window, cx));

        // Subscribe to the event InputState emits on Enter
        let subscription = cx.subscribe_in(&input, window, |this, _input, event, window, cx| {
            if let InputEvent::PressEnter { .. } = event {
                this.add_todo(window, cx);
            }
        });

        Self {
            input,
            todos: Vec::new(),
            _subscriptions: vec![subscription],
        }
    }

    fn add_todo(&mut self, window: &mut Window, cx: &mut Context<Self>) {
        let title = self.input.read(cx).value().trim().to_string();
        if title.is_empty() {
            return;
        }
        self.todos.push(Todo {
            title: title.into(),
            done: false,
        });
        self.input
            .update(cx, |input, cx| input.set_value("", window, cx));
        cx.notify();
    }

    fn clear_completed(
        &mut self,
        _: &ClearCompleted,
        _window: &mut Window,
        cx: &mut Context<Self>,
    ) {
        self.todos.retain(|todo| !todo.done);
        cx.notify();
    }
}

impl Render for TodoApp {
    fn render(&mut self, _window: &mut Window, cx: &mut Context<Self>) -> impl IntoElement {
        let remaining = self.todos.iter().filter(|todo| !todo.done).count();

        div()
            .key_context("TodoApp")
            .on_action(cx.listener(Self::clear_completed))
            .flex()
            .flex_col()
            .gap_3()
            .size_full()
            .p_4()
            .bg(cx.theme().background)
            .text_color(cx.theme().foreground)
            .child(div().text_xl().child("ToDo"))
            .child(
                div()
                    .flex()
                    .gap_2()
                    .child(div().flex_1().child(Input::new(&self.input)))
                    .child(
                        Button::new("add")
                            .primary()
                            .label("追加")
                            .on_click(cx.listener(|this, _, window, cx| this.add_todo(window, cx))),
                    ),
            )
            .children(self.todos.iter().enumerate().map(|(ix, todo)| {
                div()
                    .flex()
                    .items_center()
                    .justify_between()
                    .child(
                        Checkbox::new(("todo", ix))
                            .label(todo.title.clone())
                            .checked(todo.done)
                            .on_change(cx.listener(move |this, checked: &bool, _, cx| {
                                this.todos[ix].done = *checked;
                                cx.notify();
                            })),
                    )
                    .child(
                        Button::new(("delete", ix))
                            .ghost()
                            .label("削除")
                            .on_click(cx.listener(move |this, _, _, cx| {
                                this.todos.remove(ix);
                                cx.notify();
                            })),
                    )
            }))
            .child(
                div()
                    .text_sm()
                    .text_color(cx.theme().muted_foreground)
                    .child(format!("残り {remaining} 件")),
            )
    }
}

fn main() {
    gpui_kit::application()
        .with_assets(gpui_kit::assets::Assets)
        .run(|cx: &mut App| {
            gpui_kit::init(cx);

            cx.bind_keys([KeyBinding::new(
                "cmd-shift-backspace",
                ClearCompleted,
                Some("TodoApp"),
            )]);

            let bounds = Bounds::centered(None, size(px(420.), px(480.)), cx);
            gpui_kit::open_window(
                WindowOptions {
                    window_bounds: Some(WindowBounds::Windowed(bounds)),
                    ..Default::default()
                },
                cx,
                |window, cx| cx.new(|cx| TodoApp::new(window, cx)),
            )
            .unwrap();
            cx.activate(true);
        });
}
Defining an action
An action is a type that represents a logical operation such as "delete completed items". You define it with the actions! macro.
actions!(todo_app, [ClearCompleted]);The actions! macro generates a struct with no fields for each name listed in the second argument. This single line defines a ClearCompleted type like the following:
#[derive(Clone, PartialEq, Default, Debug, Action)]
#[action(namespace = todo_app)]
pub struct ClearCompleted;
The first argument is the namespace, and actions are identified by names of the form "namespace::TypeName", such as todo_app::ClearCompleted. Zed's keyboard shortcut settings use names in the same format to specify actions, as in "cmd-z": "editor::Undo". Which key triggers the action is not part of its definition. The mapping to keys is registered separately later.
Adding a method that handles the action
We implement what happens when ClearCompleted is triggered as a method on TodoApp.
fn clear_completed(
    &mut self,
    _: &ClearCompleted,
    _window: &mut Window,
    cx: &mut Context<Self>,
) {
    self.todos.retain(|todo| !todo.done);
    cx.notify();
}
The key point is that the second parameter's type is &ClearCompleted. GPUI determines which action a handler processes from the type of its parameter. The handler itself just keeps the unfinished ToDos and calls cx.notify().
Registering a key context and handler on an element
On the handling side, you give an element a key context name with .key_context() and register a handler with .on_action(). Here we add them to the root div() returned by render().
div()
    .key_context("TodoApp")
    .on_action(cx.listener(Self::clear_completed))
The closure that .on_action() accepts also has no self parameter, so just as with the click handler, we convert the clear_completed method with cx.listener(). The key context is used in the next step to specify where the key binding is active.
Mapping keys to the action
The mapping between keys and actions is registered separately from the elements, in main(), with cx.bind_keys().
cx.bind_keys([KeyBinding::new(
    "cmd-shift-backspace",
    ClearCompleted,
    Some("TodoApp"),
)]);
The third argument to KeyBinding::new() is the key context. A key binding with Some("TodoApp") is active only when the path from the focused element up through its ancestors includes the TodoApp key context. In this ToDo app, the input field is focused at startup with input.focus(window, cx). Since the input field is a descendant of TodoApp's element, pressing cmd-shift-backspace while typing delivers ClearCompleted up to TodoApp.
When key contexts are nested, key bindings in the inner context, closer to the focus, take precedence. For example, in Zed, editor key bindings take precedence over those of the pane and workspace that contain the editor.
Run cargo run, mark a few ToDos as done, and press cmd-shift-backspace to delete all completed ToDos at once.
Summary
- GPUI is a Rust UI framework built for Zed that breaks the UI down into primitives such as rectangles and text and draws them on the GPU
- Application state is handed to
Appwithcx.new()and read and written withread()/update()through anEntity<T>handle andApp - A View is an
Entitythat implements theRendertrait, andrender()rebuilds the element tree from state on every re-render - After changing state, call
cx.notify()to ask GPUI to re-render - To change a View's state from a handler such as a click handler, convert the closure with
cx.listener() - To handle events such as clicks on a
div(), you need to give it an ID with.id() - GPUI itself has no components such as input fields, but GPUI Kit (gpui-component) fills the gap with
Input,Checkbox, andButton. When using GPUI Kit, callgpui_kit::init()and open windows withgpui_kit::open_window() - Keyboard operations are handled by defining actions with
actions!, processing them with.key_context()and.on_action(), and mapping them to keys withcx.bind_keys()
References
GPUI
zed/crates/gpui at main · zed-industries/zed
Leveraging Rust and the GPU to render user interfaces at 120 FPS - Zed Blog
Stanislav Vishnevskiy's post on X (November 4, 2026)
「Discord」がクライアント全体を「Rust」で書き直し、「Electron」から脱却へ - 窓の杜 (Japanese)
GPUI Kit
gpui - crates.io