
MCP (Model Context Protocol) defines two transports: the stdio transport, which runs locally, and the Streamable HTTP transport, which runs remotely. When MCP first appeared, the stdio transport was the main one in use, but the Streamable HTTP transport has been gaining traction for reasons such as:
- It is easy to set up and accessible even to non-engineers
- It can be used from cloud-hosted clients
- The OAuth authentication story is in place
On the other hand, the Streamable HTTP transport comes with its own challenges compared to stdio: you have to stand up a server to accept HTTP requests, and the options for distributing it privately are limited.
OpenAI's Secure MCP Tunnel is a tunneling service that lets you connect a private MCP server to OpenAI products without exposing it to the public internet. This makes it possible to call MCP servers from ChatGPT, Codex, and other OpenAI products even when those servers live on-premises or behind a firewall.
In this article, I will walk through what it looks like to actually try out OpenAI's Secure MCP Tunnel.
Prerequisites for Secure MCP Tunnel
As a prerequisite, head over to the Tunnels page in the OpenAI platform to obtain a
tunnel_id. The default Owner role does not allow creating tunnels, so you need to create a new role. From People & Permissions > Roles, click "Create role" to create a new role, and under "Permissions" enable "Manage" and "Use" for "Tunnels".
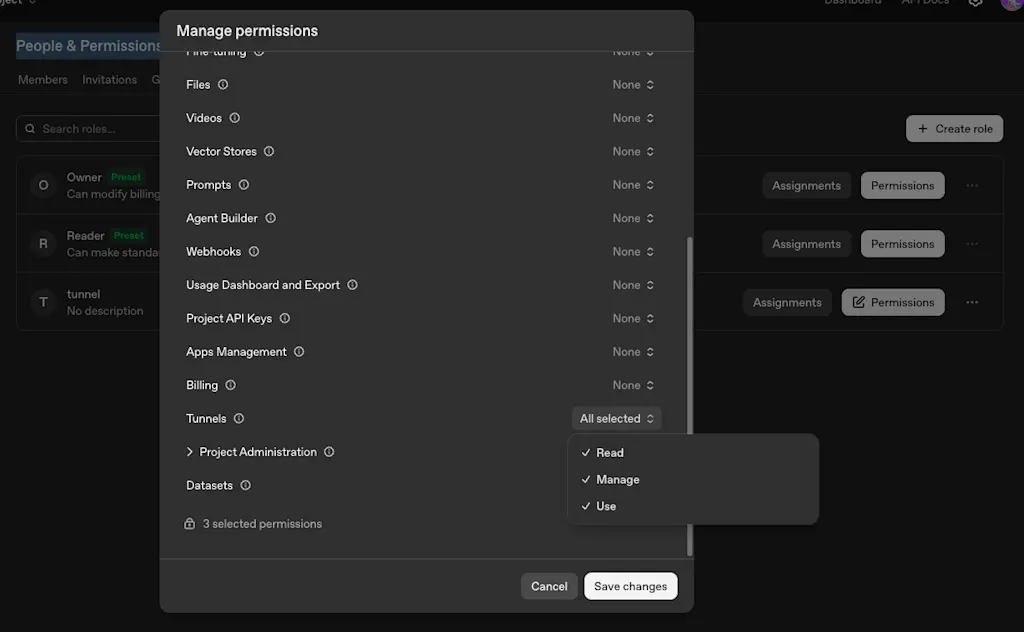
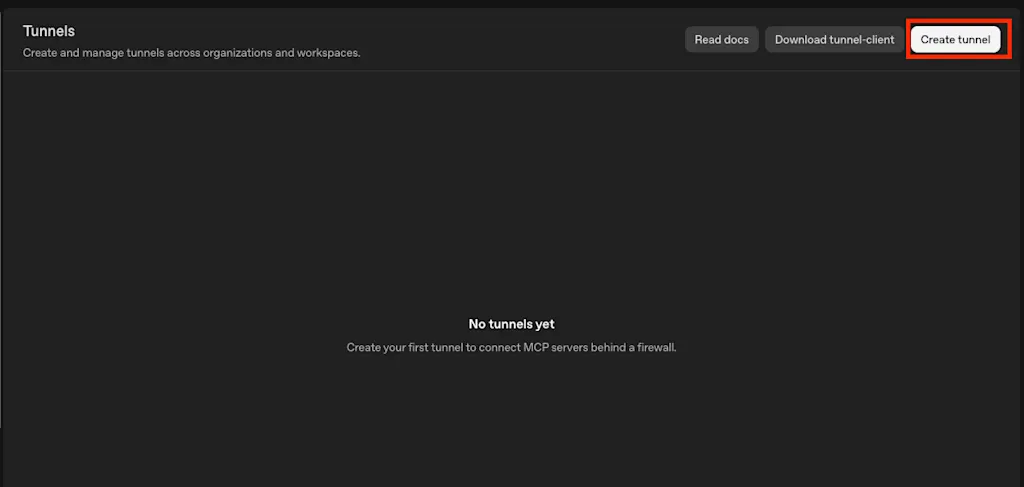
You can then assign this new role to a user from the Members tab. Log in as a user with the role assigned and visit the
Tunnels page — the "Create Tunnel" button should now be enabled.
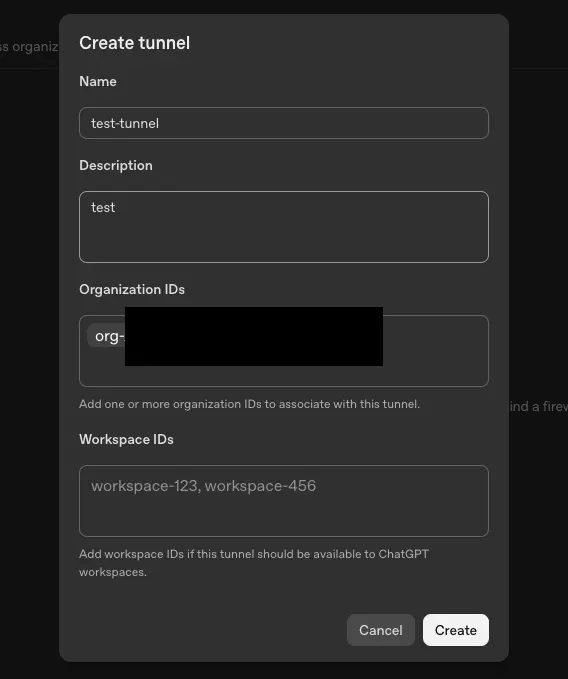
A dialog for creating a tunnel appears. Fill in the "Name" and "Description" and click "Create". The "Organization Ids" field is pre-populated, so you can leave it as-is.
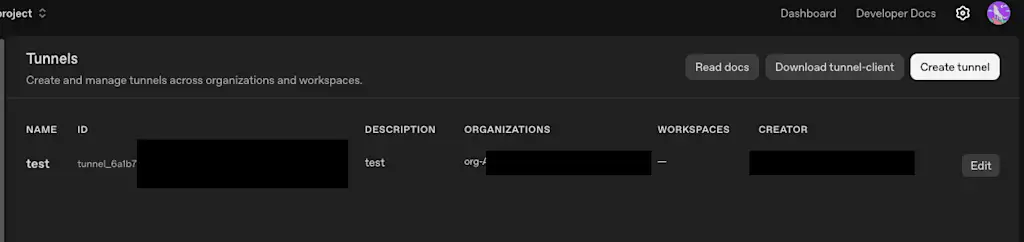
Once the tunnel is created, an ID is issued. Make a note of it.
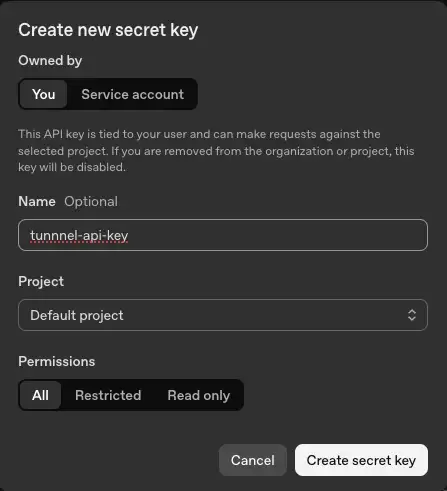
Next, create an API key. From API Keys, click "Create new secret key" to issue one. The API key needs the "Read" and "Use" permissions for "Tunnels".
Setting Up the Tunnel Client
Secure MCP Tunnel uses a CLI called tunnel-client to bridge the MCP server running on your machine and the OpenAI products. You can install tunnel-client from the URL below — check the latest version as needed.
Once the download is done, put tunnel-client on your PATH so the command is executable. Run the following in your terminal to confirm that tunnel-client is installed correctly.
tunnel-client --versionBefore going further, prepare a stdio-transport MCP server. Here I implemented a small MCP server in TypeScript that does nothing more than basic arithmetic.
Example of an MCP server running over the stdio transport
import { McpServer } from "@modelcontextprotocol/sdk/server/mcp.js";
import { StdioServerTransport } from "@modelcontextprotocol/sdk/server/stdio.js";
import { z } from "zod";

const server = new McpServer({
  name: "calculator",
  version: "1.0.0",
});

server.registerTool(
  "add",
  {
    description: "Adds two numbers",
    inputSchema: {
      a: z.number().describe("First number"),
      b: z.number().describe("Second number"),
    },
  },
  async ({ a, b }) => ({
    content: [{ type: "text", text: `${a} + ${b} = ${a + b}` }],
  }),
);

// ... other tools

async function main() {
  const transport = new StdioServerTransport();
  await server.connect(transport);
  console.error("Calculator MCP server started");
}

main().catch((err) => {
  console.error("Server error:", err);
  process.exit(1);
});
Set the API key you just created to the CONTROL_PLANE_API_KEY environment variable, then run tunnel-client init. Pass the tunnel ID you noted earlier with --tunnel-id. The command to launch the local MCP server is specified via --mcp-command. If you want to point at a remote MCP server instead, specify it like --mcp-server-url https://example.com/mcp.
export CONTROL_PLANE_API_KEY="sk-xxxxxx" # The API key you created earlier

tunnel-client init \
  --sample sample_mcp_stdio_local \
  --profile local-stdio \
  --tunnel-id tunnel_xxxx \
  --mcp-command "bun /path/to/server.ts"
Running tunnel-client init generates a profile file at ~/tunnel-client/local-stdio.yaml. From now on, you can specify this profile when running tunnel-client, which saves you from passing the same command-line arguments every time.
config_version: 1
control_plane:
  base_url: "https://api.openai.com"

  tunnel_id: "tunnel_xxxx"
  api_key: "env:CONTROL_PLANE_API_KEY"
health:
  # Keep a fixed port when you want a stable local admin URL.
  # For concurrent or clean-room runs, switch listen_addr to "127.0.0.1:0" and
  # set url_file so another process can discover the resolved /healthz, /readyz,
  # /metrics, and /ui base URL.
  listen_addr: "127.0.0.1:8080"
  # url_file: "/tmp/tunnel-client-health.url"
admin_ui:
  open_browser: false
log:
  level: info
  format: json
mcp:
  commands:
    - channel: main
      command: "bun /path/to/server.ts"
Starting the Tunnel Client
Once the profile is set up, run tunnel-client run to start the tunnel. Pass the profile you just created as an argument.
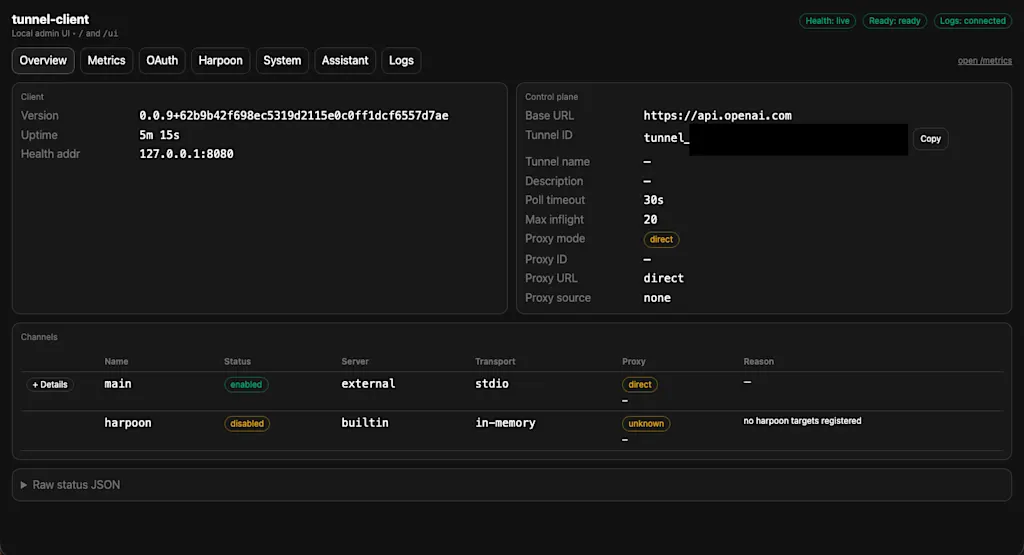
tunnel-client run --profile local-stdioIf you see "🟢 tunnel-client started" in the log, you are good to go. Visiting http://localhost:8080 will bring up the admin UI.
Calling the MCP Server from ChatGPT
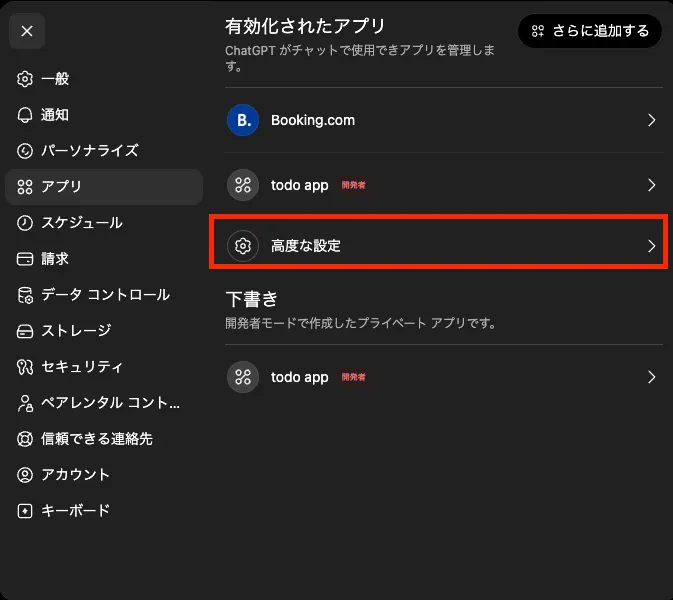
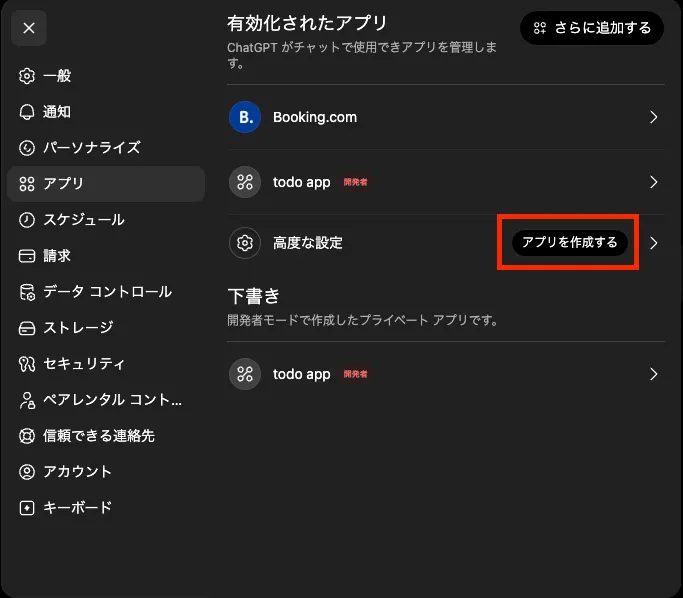
Open ChatGPT's Connector settings and add a custom connector. To add a custom connector, you first need to enable "Developer mode" under "Advanced settings".
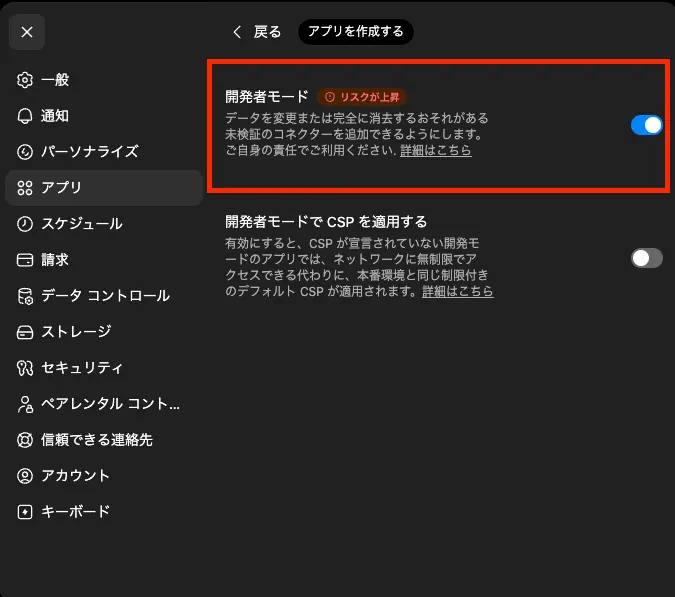
Once "Developer mode" is on, a "Create app" button appears in the connector settings. Click it to create a new connector.
Under "Connection", choose "Tunnel". The available tunnels will appear in a dropdown. The tunnel you created may not always show up there — when that happens, click "Enter tunnel ID instead" and type in the tunnel ID you noted earlier. For "Authentication", select "No authentication".
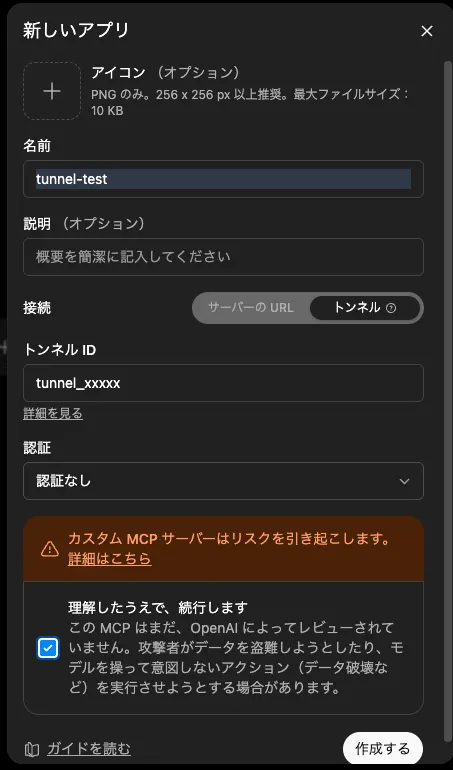
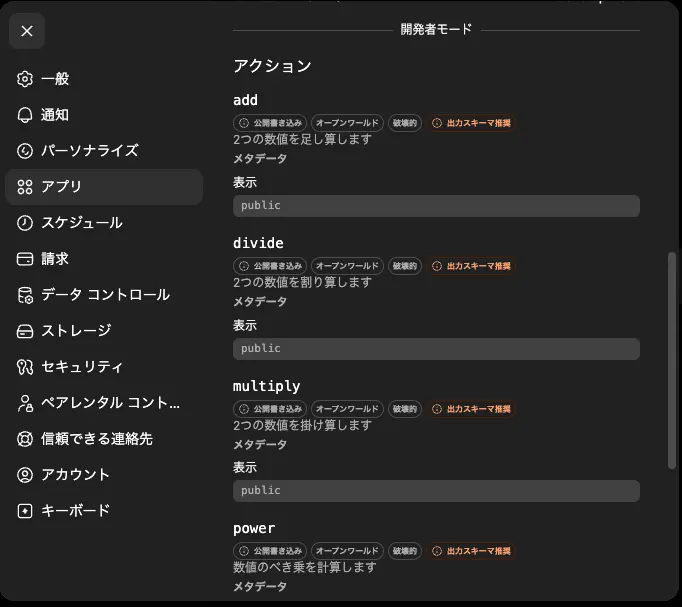
Click the "Create" button and a new app is added — let's connect it to ChatGPT. If you open the app's details, you can see that the tool list of the MCP server running locally is displayed.
Now let's actually try calling a tool from a chat. Before starting the chat, click the "+" button and pick the app you just created. From there, you can invoke the MCP server's tools straight from the chat.
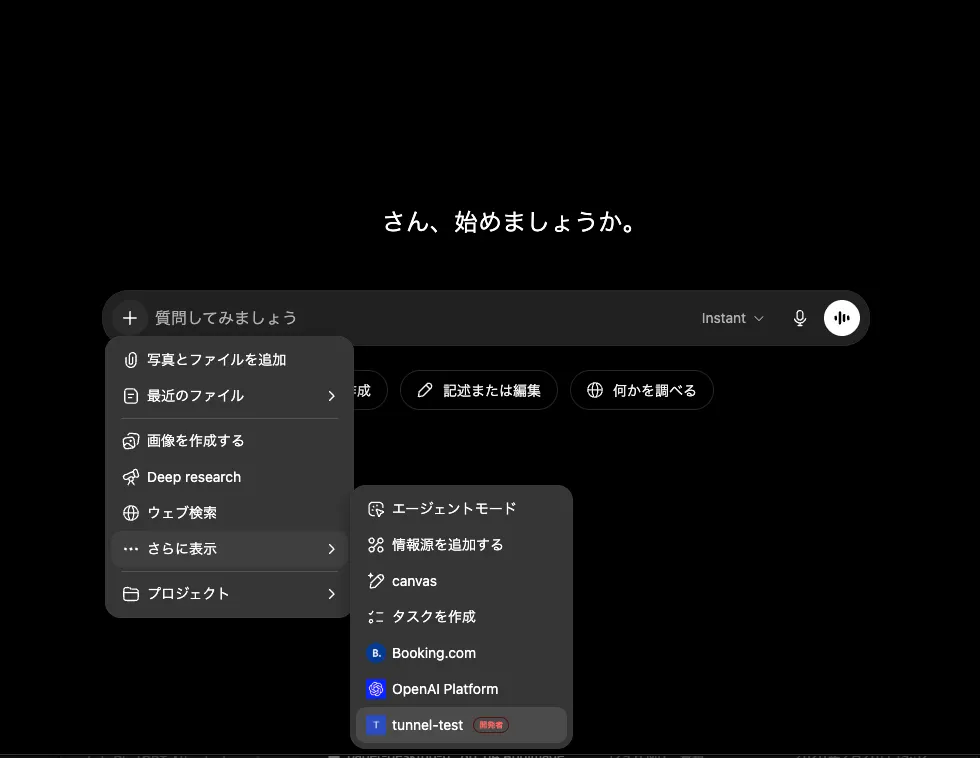
Try entering a prompt like the following.
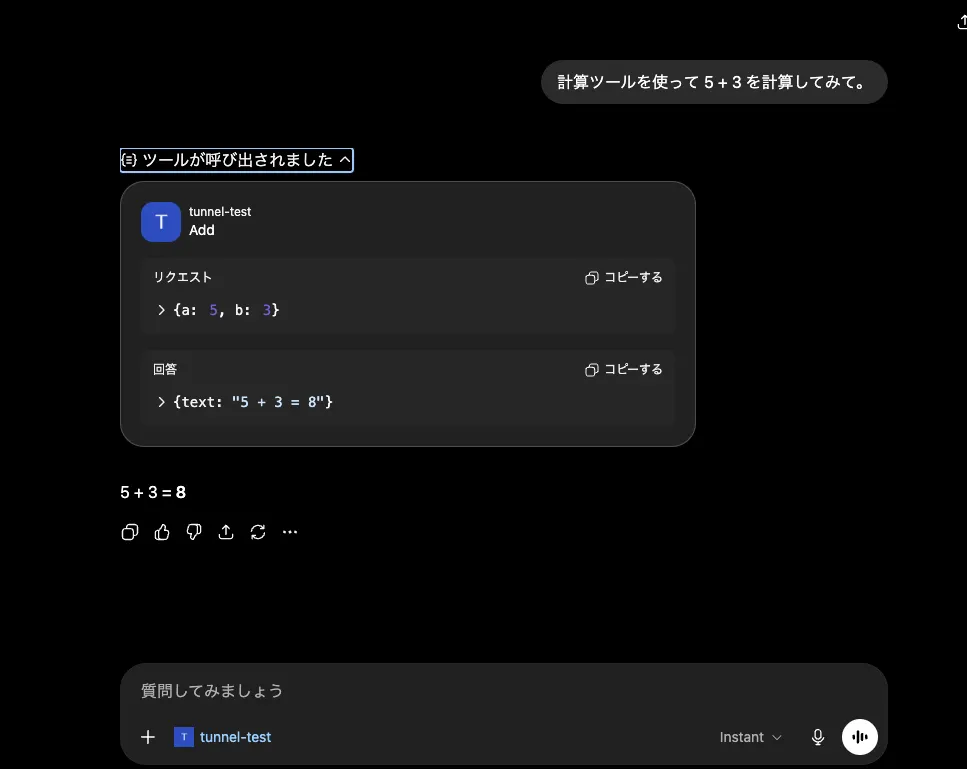
Use the calculator tool to compute 5 + 3.You can see that the add tool of the "tunnel-test" app we created is invoked and the correct result is returned.
In this example, I connected a local MCP server to a tunnel, but tunnel-client needs to run inside the same trust boundary that can reach the private MCP server. For production use, you might run tunnel-client as a Pod inside a Kubernetes cluster, or run it on a VM that sits in the same network as the MCP server.
Summary
- OpenAI's Secure MCP Tunnel lets you connect a private MCP server to OpenAI products without exposing it to the public internet
- To use Secure MCP Tunnel, you need to create a tunnel on the OpenAI platform, issue an API key, and set up the
tunnel-clientCLI. Note that creating a tunnel requires assigning the appropriate role to the user - The
tunnel-clientCLI is used to connect a locally running MCP server to OpenAI products - With a ChatGPT custom connector, you can invoke the MCP server's tools straight from ChatGPT